You can simply upload a logo to your website using either the FlexiPress Theme Options or the FlexiPress Logo Elementor Element (if you use custom Elementor header/footer builder). Follow the steps below to complete the process.
Uploading a Logo via FlexiPress Theme Options
Note: This won’t work if you’re using custom Elementor header/footer builder
- Log in to your WordPress Dashboard.
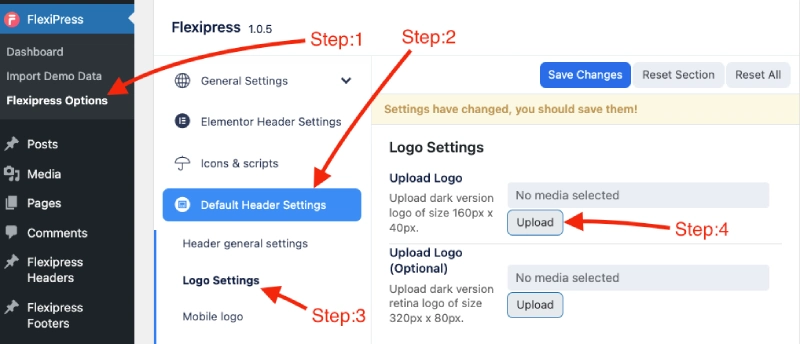
- Navigate to Flexipress-> FlexiPress Options -> Default Header Settings.
- Locate the Logo Settings section.
- Click the Upload button.
- Select your logo file from your computer.
- Click Open, then Save Changes.

Uploading a Logo Using the FlexiPress Logo Elementor Element
In the FlexiPress Theme, you can manage headers and footers using the built-in FlexiPress Headers and FlexiPress Footers custom post types.
Step 1: Create or Edit a Header/Footer
- Go to your WordPress Dashboard.
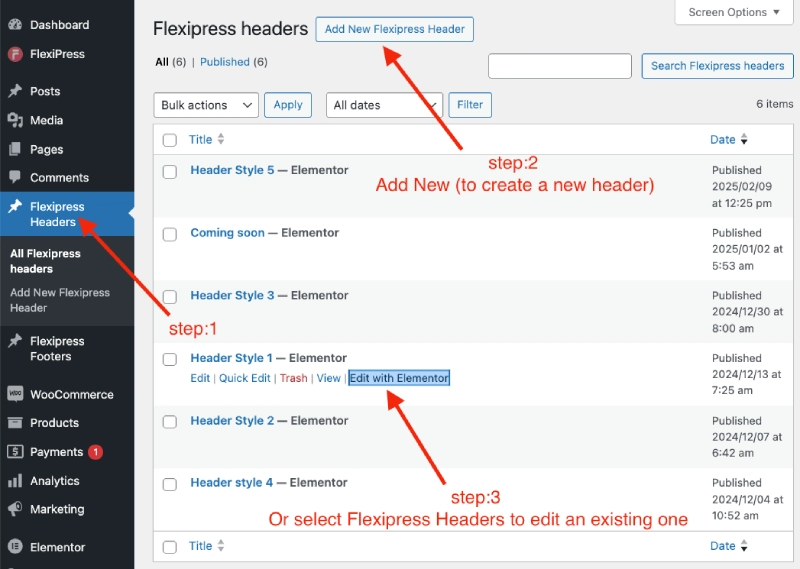
- Navigate to FlexiPress Headers -> Add New (for a new header) or FlexiPress Headers (to edit an existing one).
- Enter a title for the header and click Publish.
- Click Edit with Elementor to open the Elementor editor.

Step 2: Add the FlexiPress Logo Element
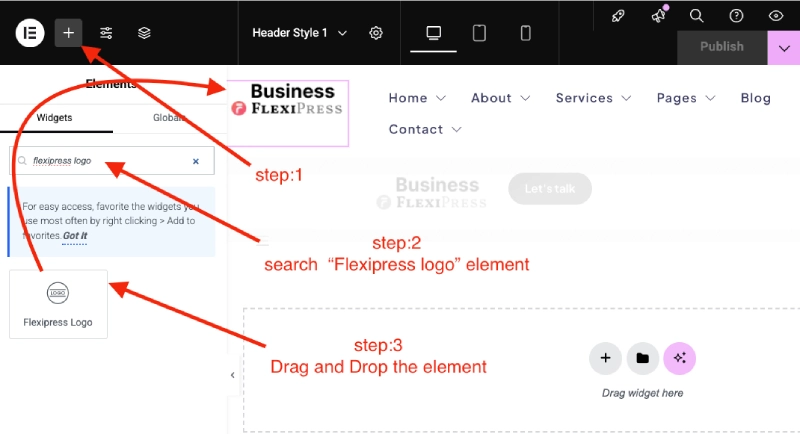
- Search for the FlexiPress Logo element in the Elementor widget panel.
- Drag and drop the FlexiPress Logo element into the header area.
- Click on the element to open the settings panel.
- Click the Choose Logo image option and select your logo file.
- Customize the logo size, Link target as needed.
- Click Update to save the changes.

