Creating menus, including dropdown and mega menus, for your website is straightforward, as the theme comes with built-in mega menu features. Follow the steps below to configure your navigation menu effortlessly.
Creating a Simple Dropdown Menu
A simple dropdown menu allows you to create hierarchical navigation by nesting submenu items under a parent menu item. Here’s how to set it up:
Navigate to the Menu Settings:
Go to Appearance → Menus in your WordPress dashboard.
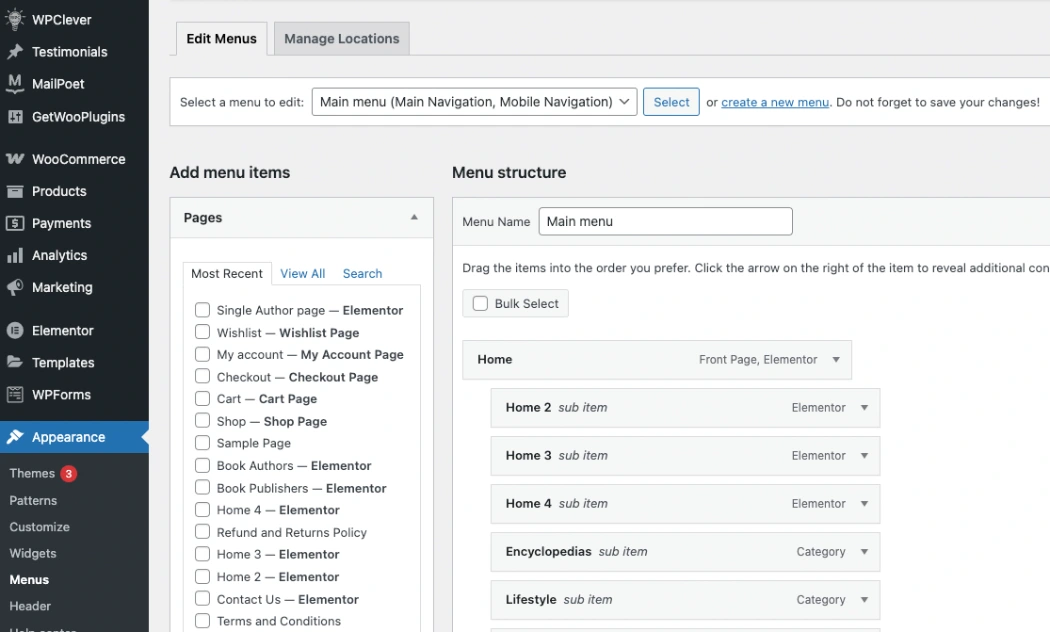
Select the Main Menu from the dropdown and click Select.
Add Menu Items:
From the left panel, choose pages, custom links, or categories that you want to add to the menu.
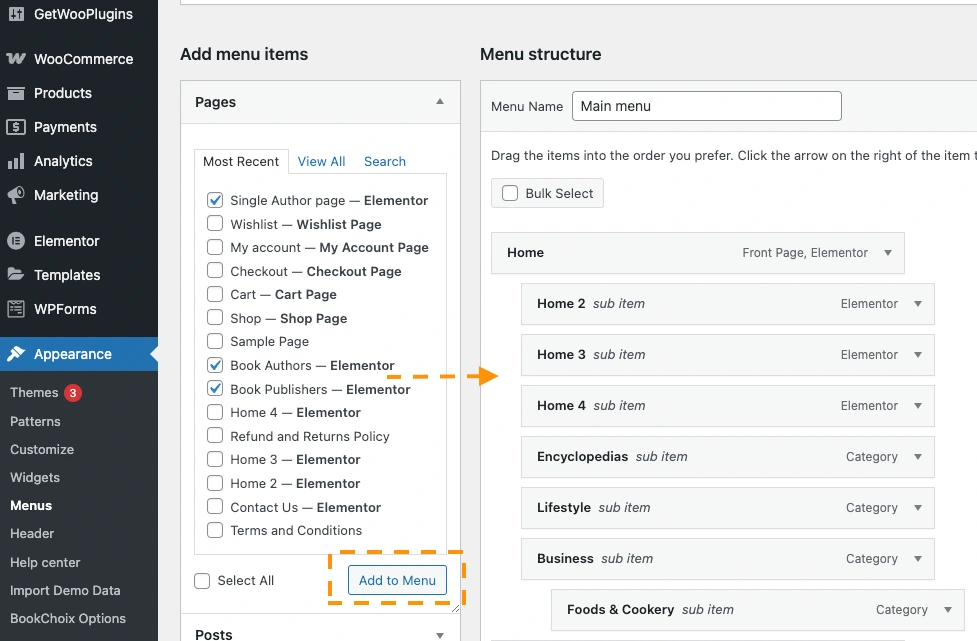
Click Add to Menu.
Arrange Submenu Items:
To create a dropdown, simply drag the submenu item slightly to the right under the parent menu item.
Once you have arranged the submenu items appropriately, click Save Menu to apply the changes. Your navigation will now display a structured dropdown menu as shown below.

Creating a Mega Menu
A Mega Menu allows you to display multiple columns, widgets, images, and more within your navigation. Follow these steps to enable the Mega Menu feature:
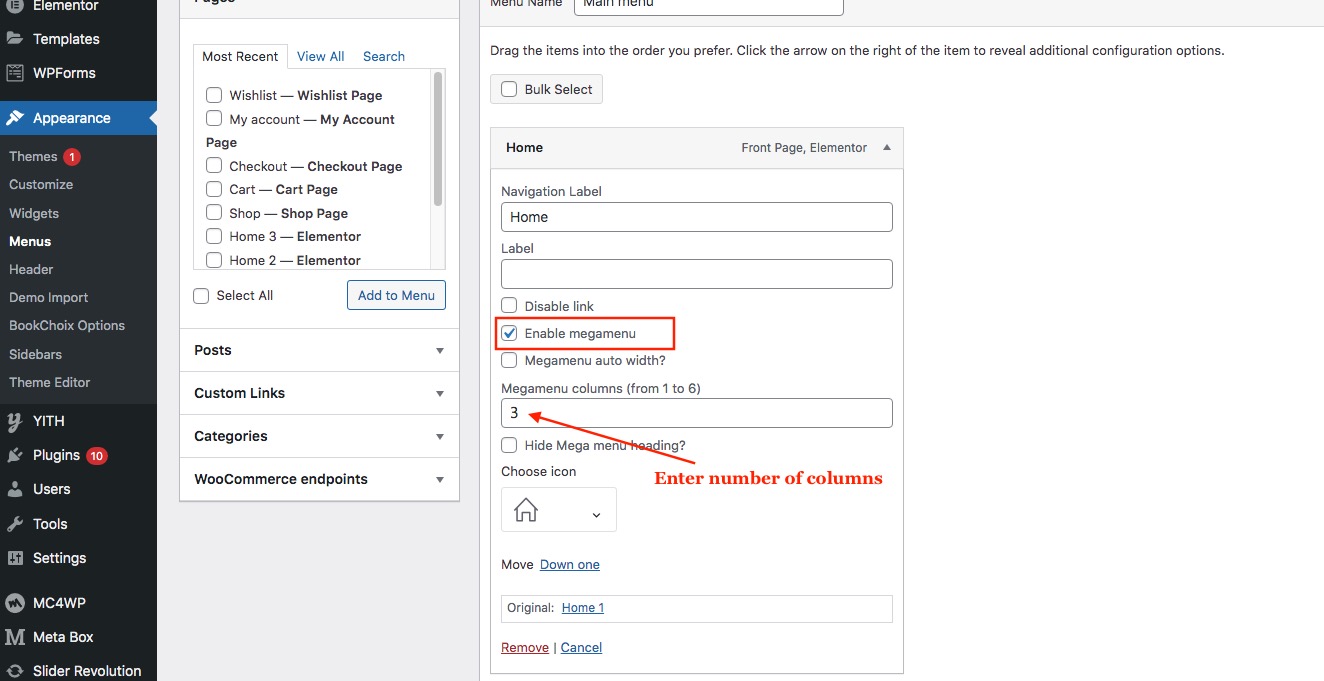
Enable Mega Menu:
In the Appearance → Menus section, add a top-level menu item that will serve as the Mega Menu trigger.
Click the dropdown arrow on the parent menu item and check the option Enable Mega Menu (if applicable) and set number of columns that you want in the mega menu.
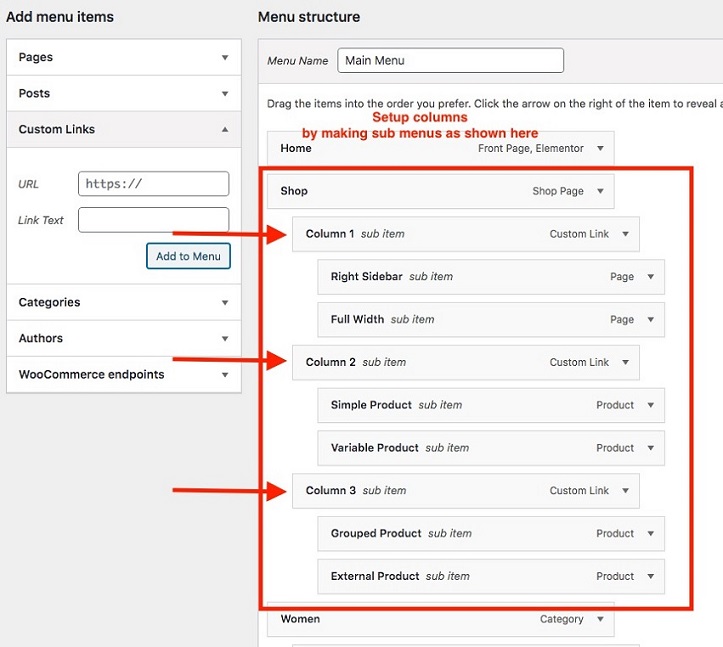
Define Columns and Submenus:
Drag submenu items under the parent menu item.
Arrange them in columns by dragging them into different positions.
Adding Widgets or Images:
To insert an image or widget inside a mega menu column, go to Appearance → Widgets.
Add a widget to a sidebar.
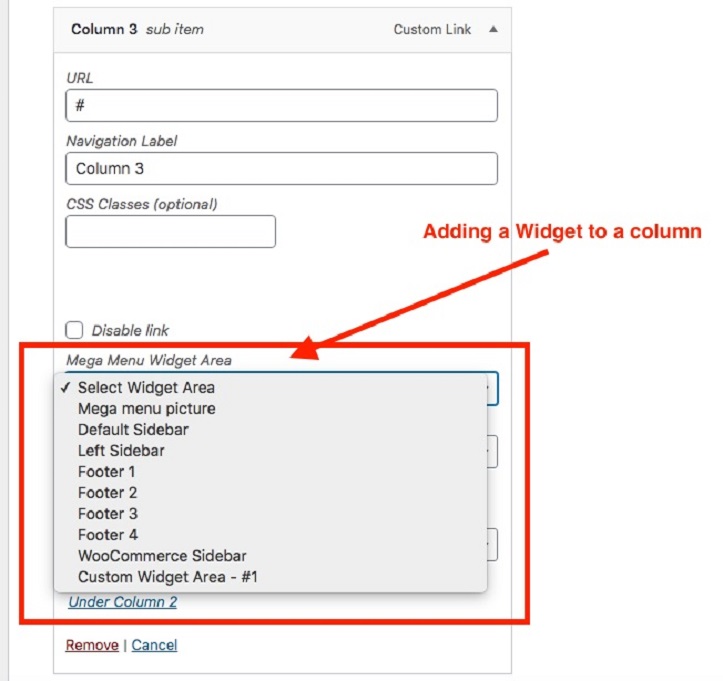
In the menu settings, select the corresponding sidebar from the dropdown to assign it to the menu column.
Save and Publish:
Once the mega menu is structured as needed, click Save Menu to apply the changes.