Multi-Currency Support
TableX allows you to display pricing in multiple currencies for international customers.
- Improve user experience
- Display localized pricing
- Support global audiences
Use Multiple Currencies in Pricing Tables
TableX allows you to display pricing in multiple currencies, making it easier to serve customers from different regions. Follow the steps below to enable and configure multiple currencies for your pricing tables.
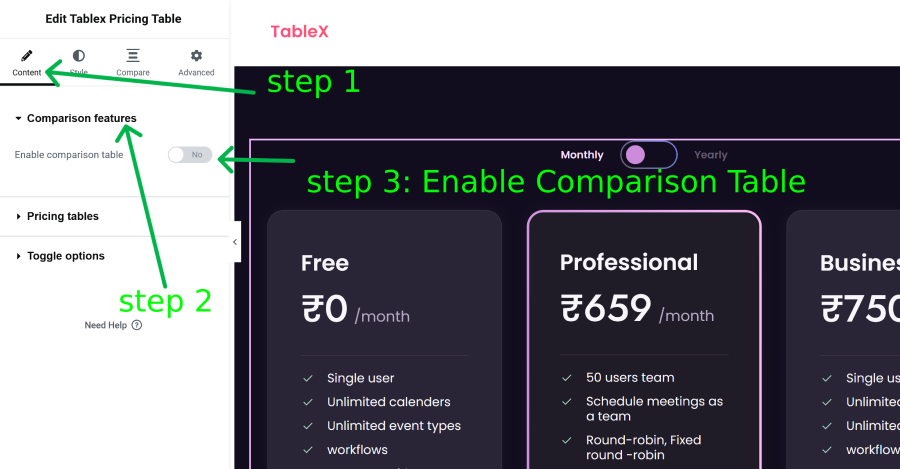
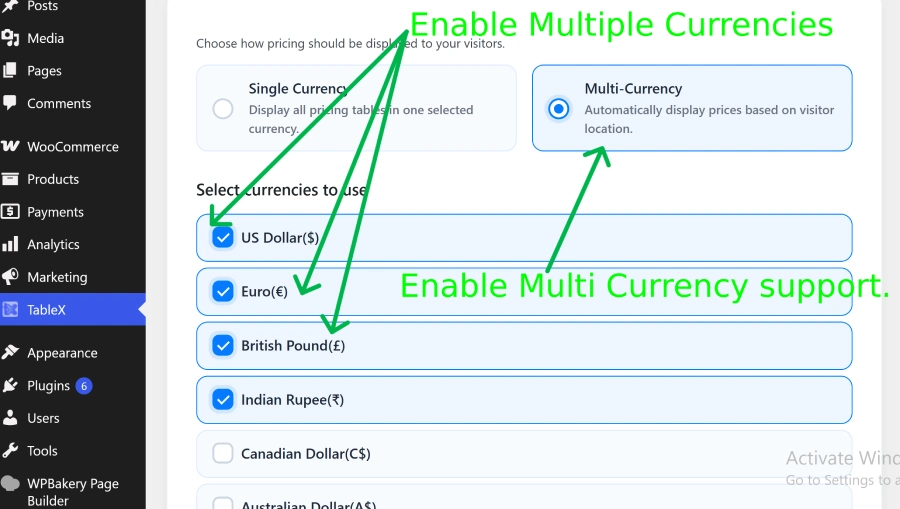
Enable Multiple Currencies
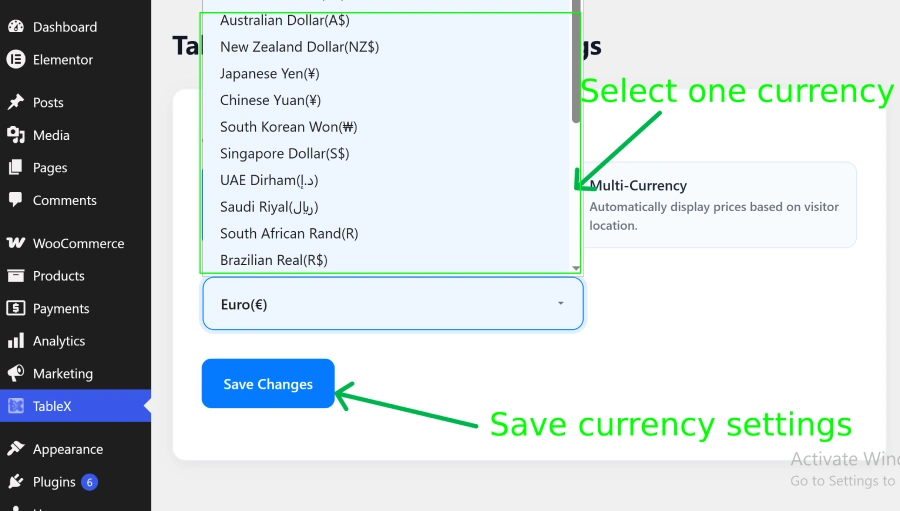
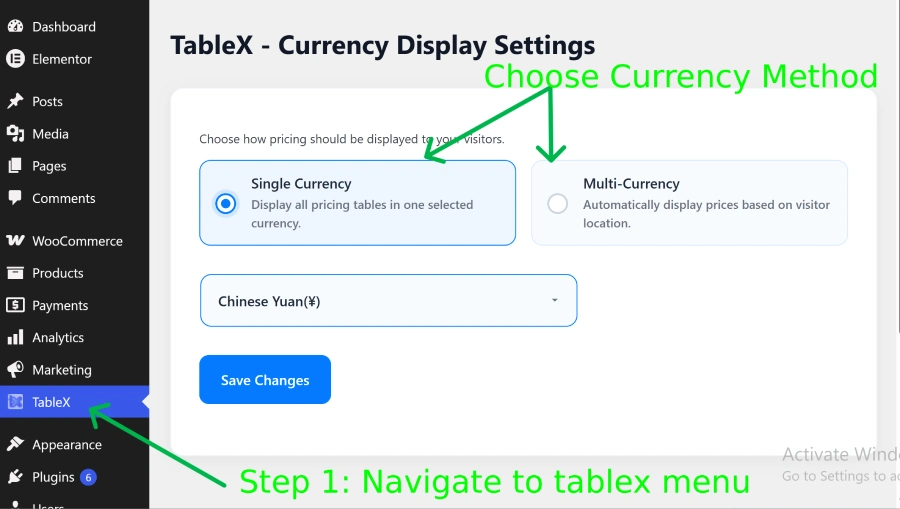
- After activating the plugin, navigate to WordPress Dashboard -> TableX.
- Open the Currency Display Settings section.
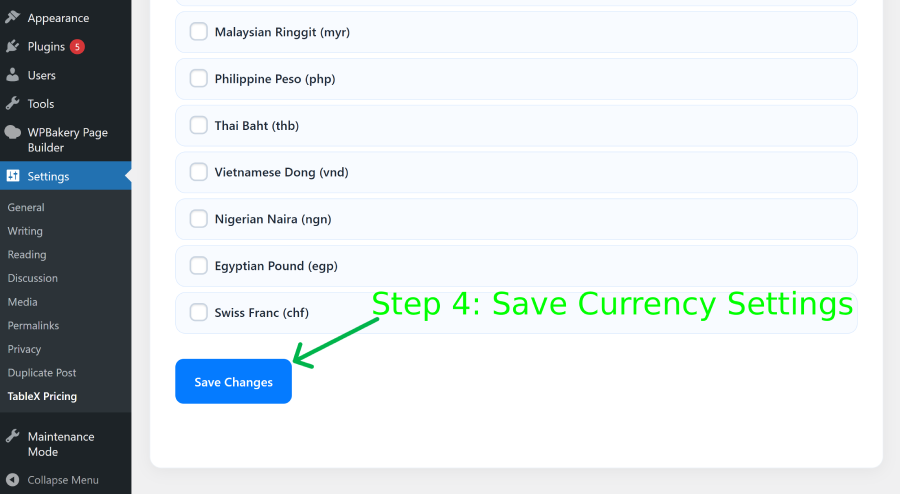
- Select the currencies you want to enable using the available checkboxes.
- Save the selected currency settings.
Configure Currency Prices
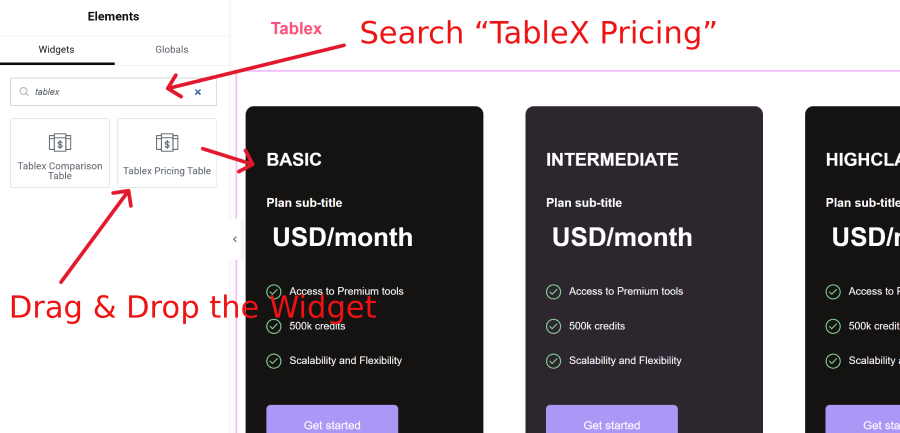
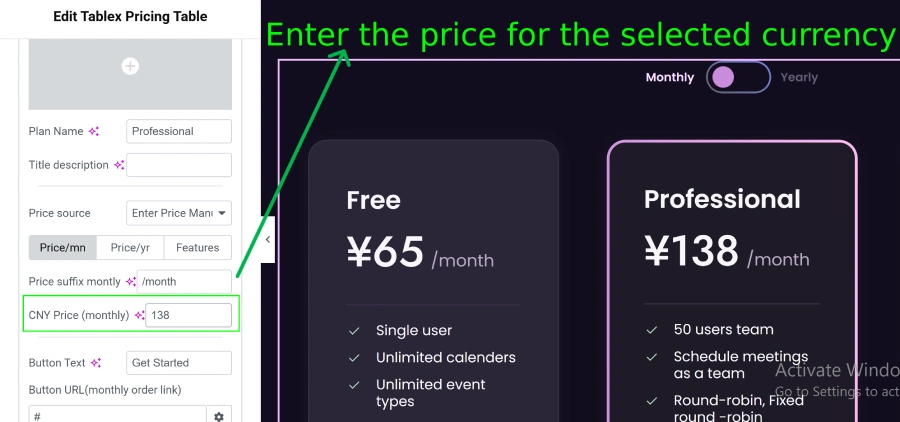
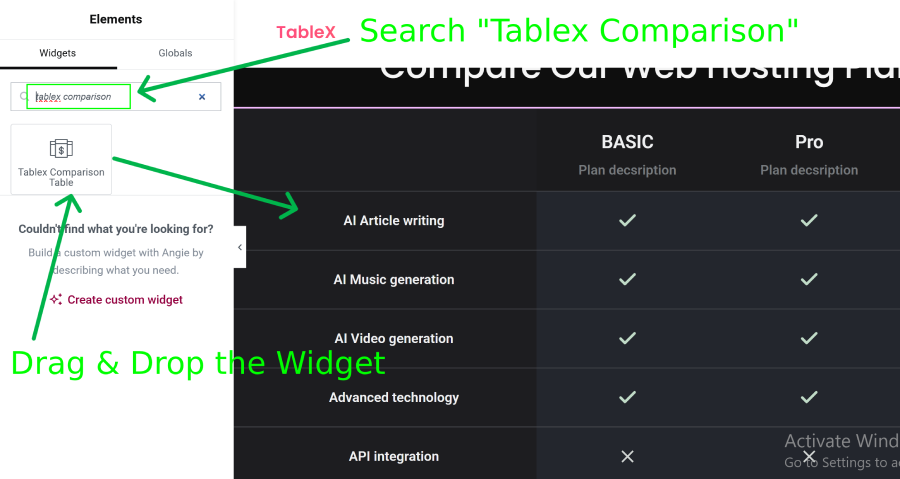
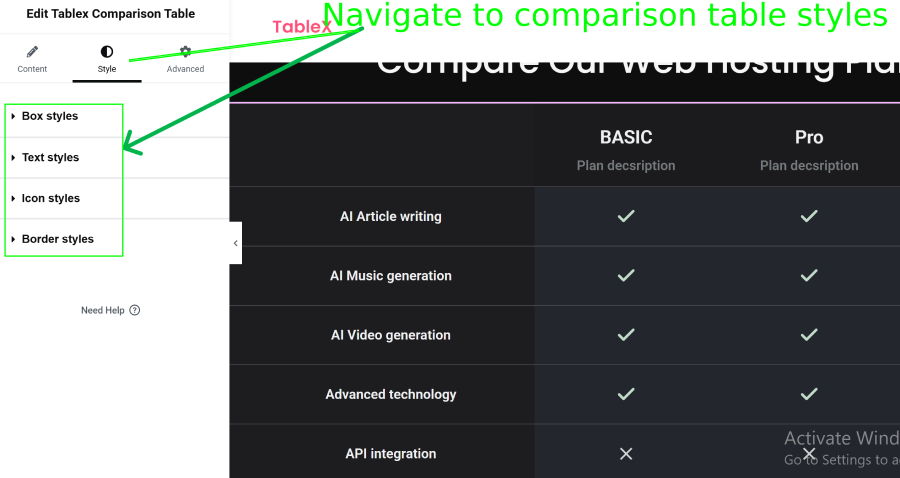
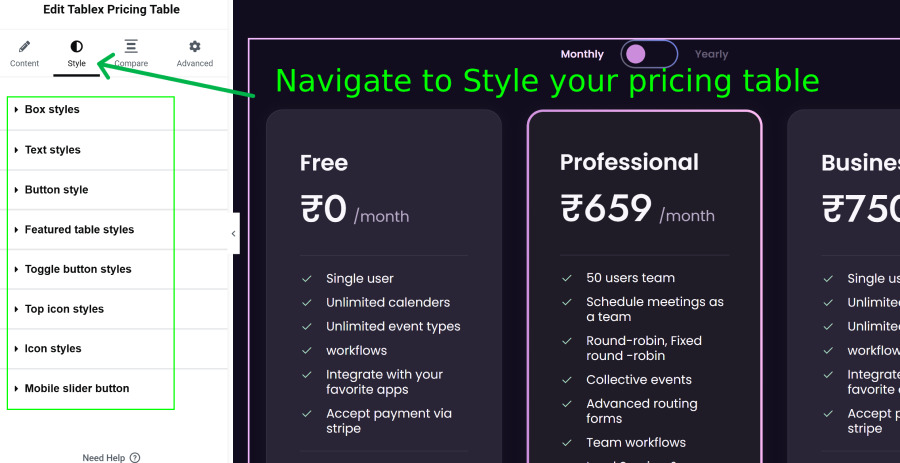
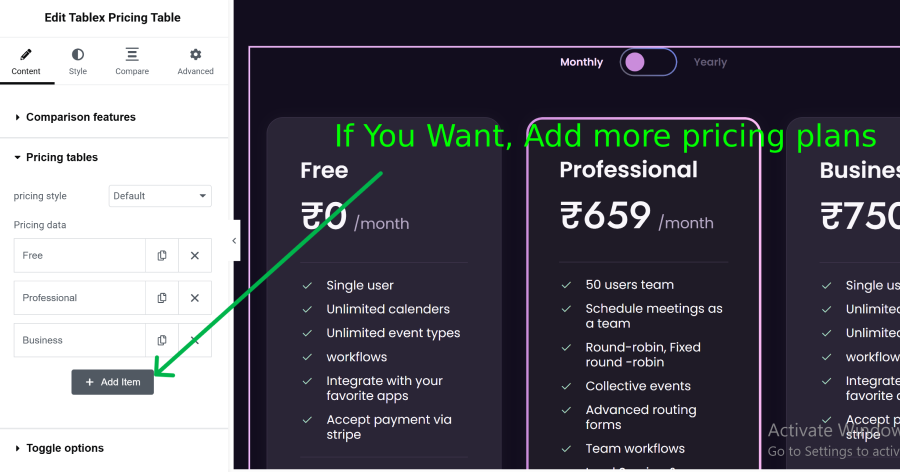
- Edit your page with Elementor and open the TableX Pricing widget.
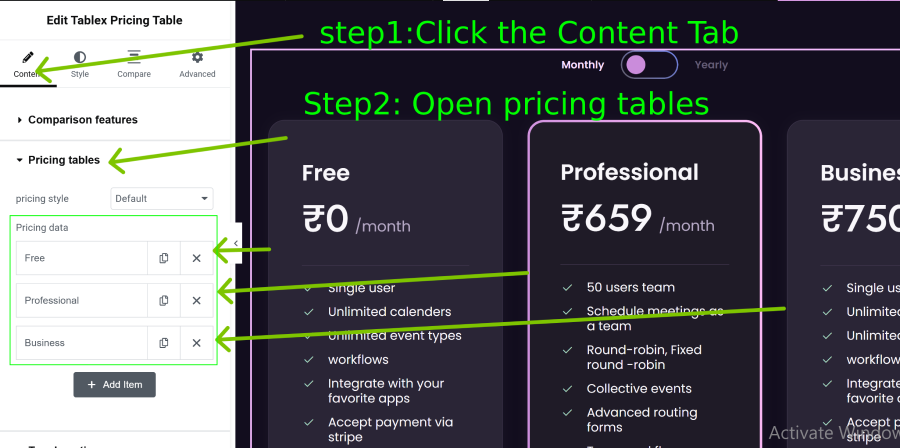
- Navigate to Content → Pricing Tables.
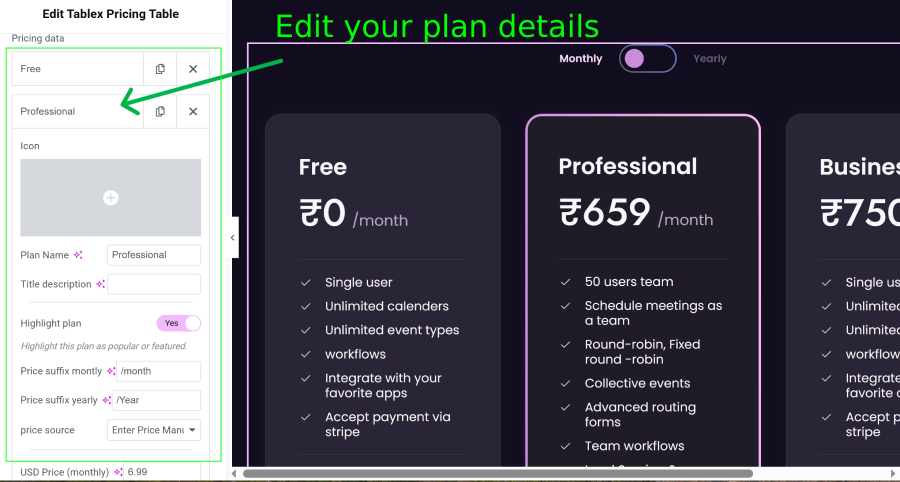
- Open any pricing plan item to edit its content.
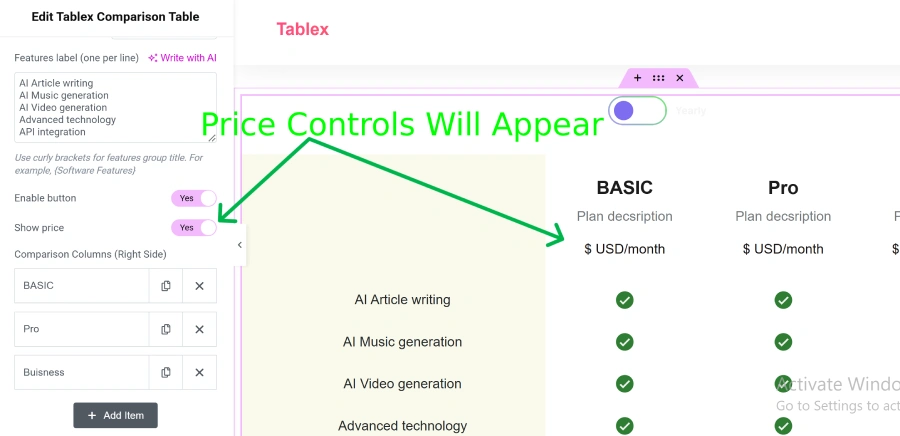
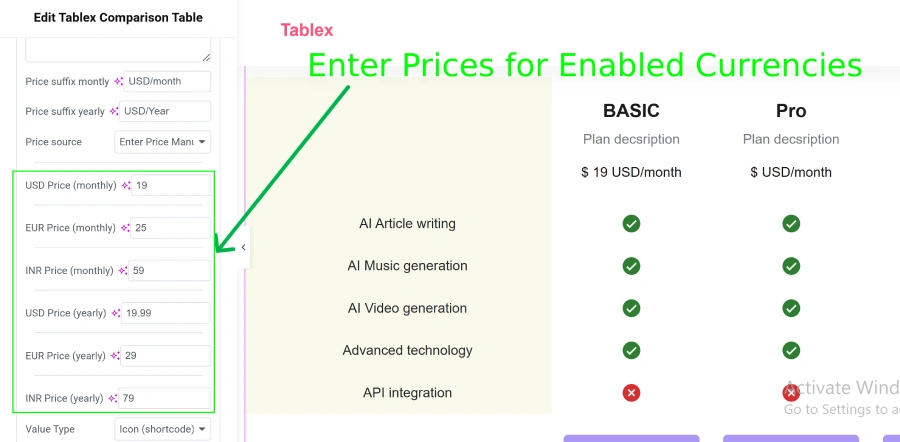
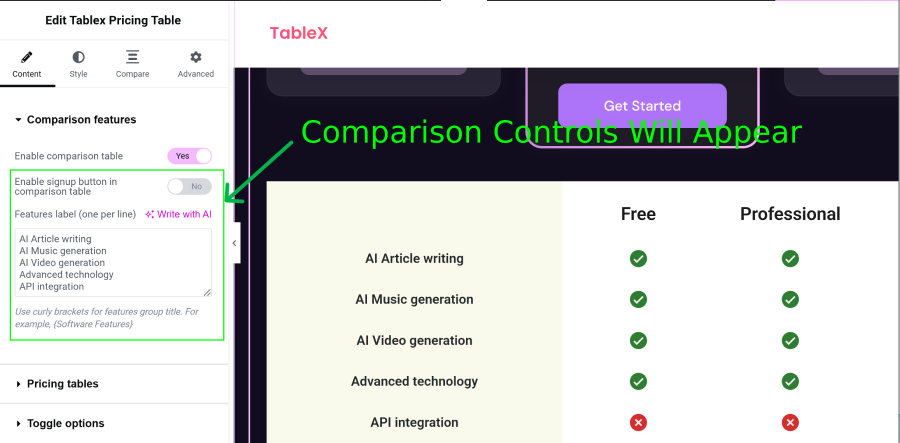
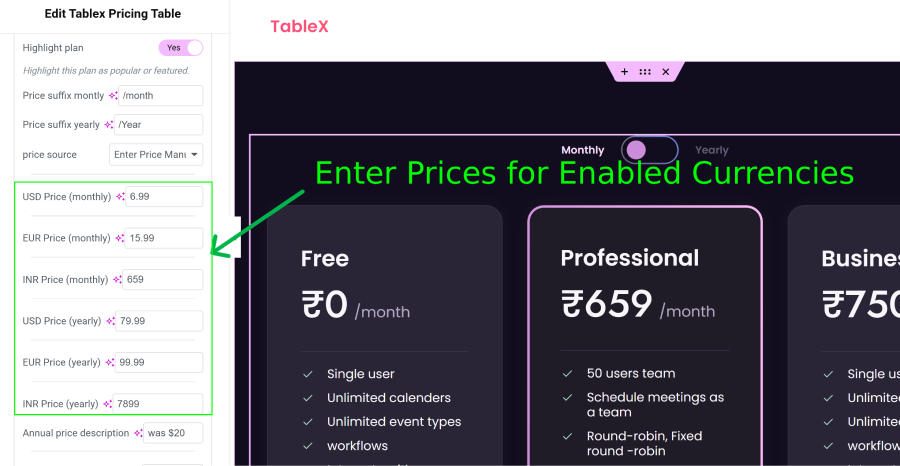
- After enabling currencies, separate Price Text fields will appear for each selected currency.
- Enter the pricing values for each currency individually.
- Update the page to apply the multi-currency pricing changes.
How Currency Detection Works
When a visitor accesses your website, TableX detects their country and displays prices in the corresponding currency based on your configured currency settings.
To improve performance, the detected currency is stored in the visitor’s browser using a cookie. On subsequent visits, TableX uses the saved currency from the cookie instead of performing a new location lookup, resulting in faster page loading and a consistent user experience.
Note: If a visitor changes their location, uses a VPN, or the currency settings are modified, the previously stored currency may continue to be used until the browser cookie expires or is cleared.
Result
Once configured, your pricing tables will support multiple currencies, allowing visitors to view pricing information based on the currencies you have enabled.
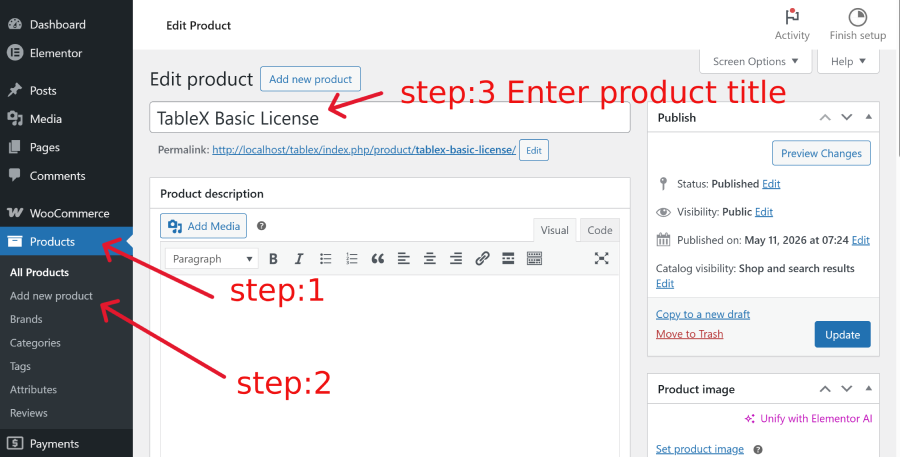
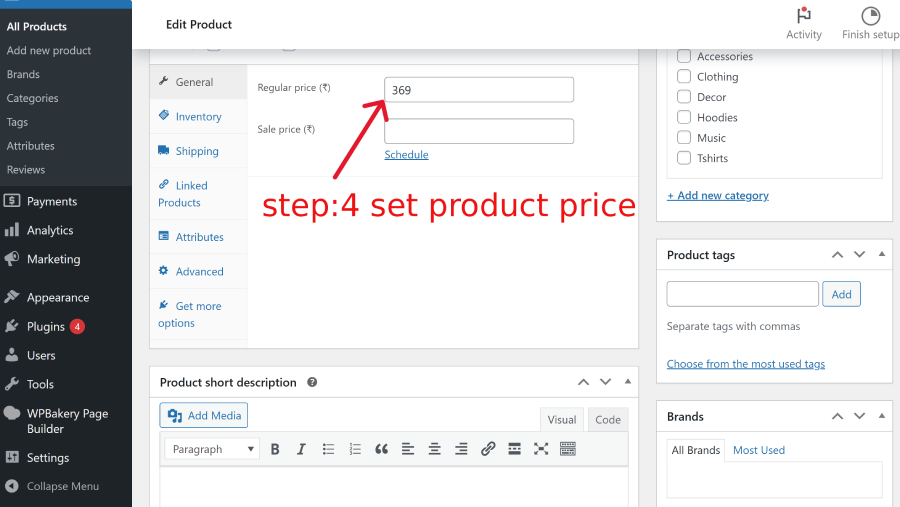
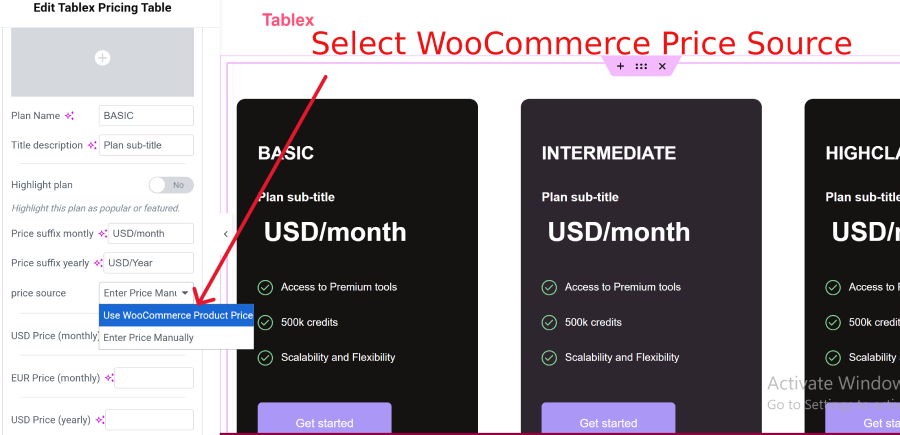
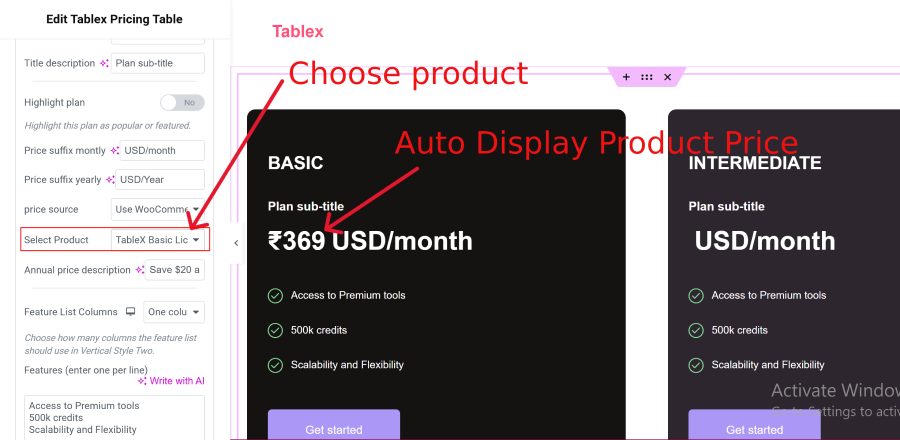
Note: Multi-currency support works only when the Price Source is set to Manual. If you use the WooCommerce Product Price source, the WooCommerce plugin will automatically handle the product pricing currency.